
Condition-Specific Pain Management
10 Effective Pinched Nerve Sciatica Stretches for Pain Relief
Introduction
Many people face the daily struggle of sciatica, a condition that can turn even the simplest activities into challenges. We’re here to share ten evidence-based stretches that can help ease your sciatica pain, guiding you toward relief and better mobility. As you explore these targeted exercises, you might be asking: which stretches will work best for me, and how can I easily fit them into my daily routine for lasting relief?
Knee-to-Chest Stretch for Sciatica Relief
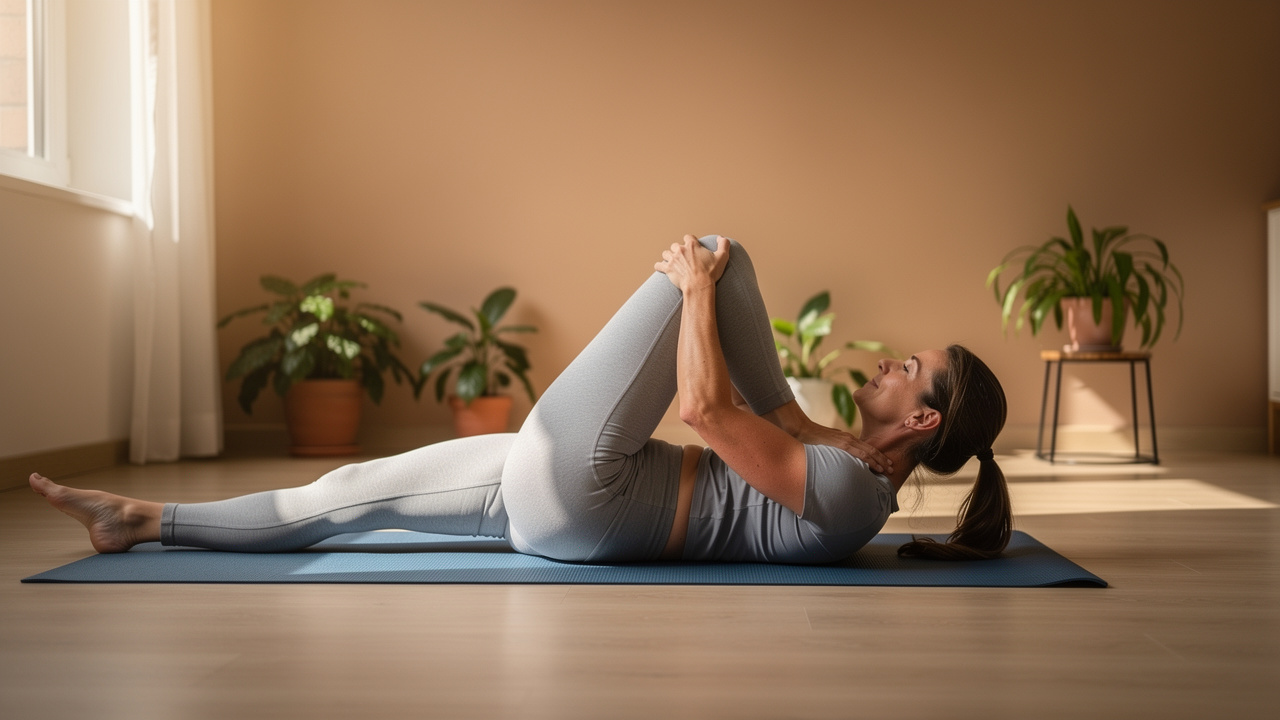
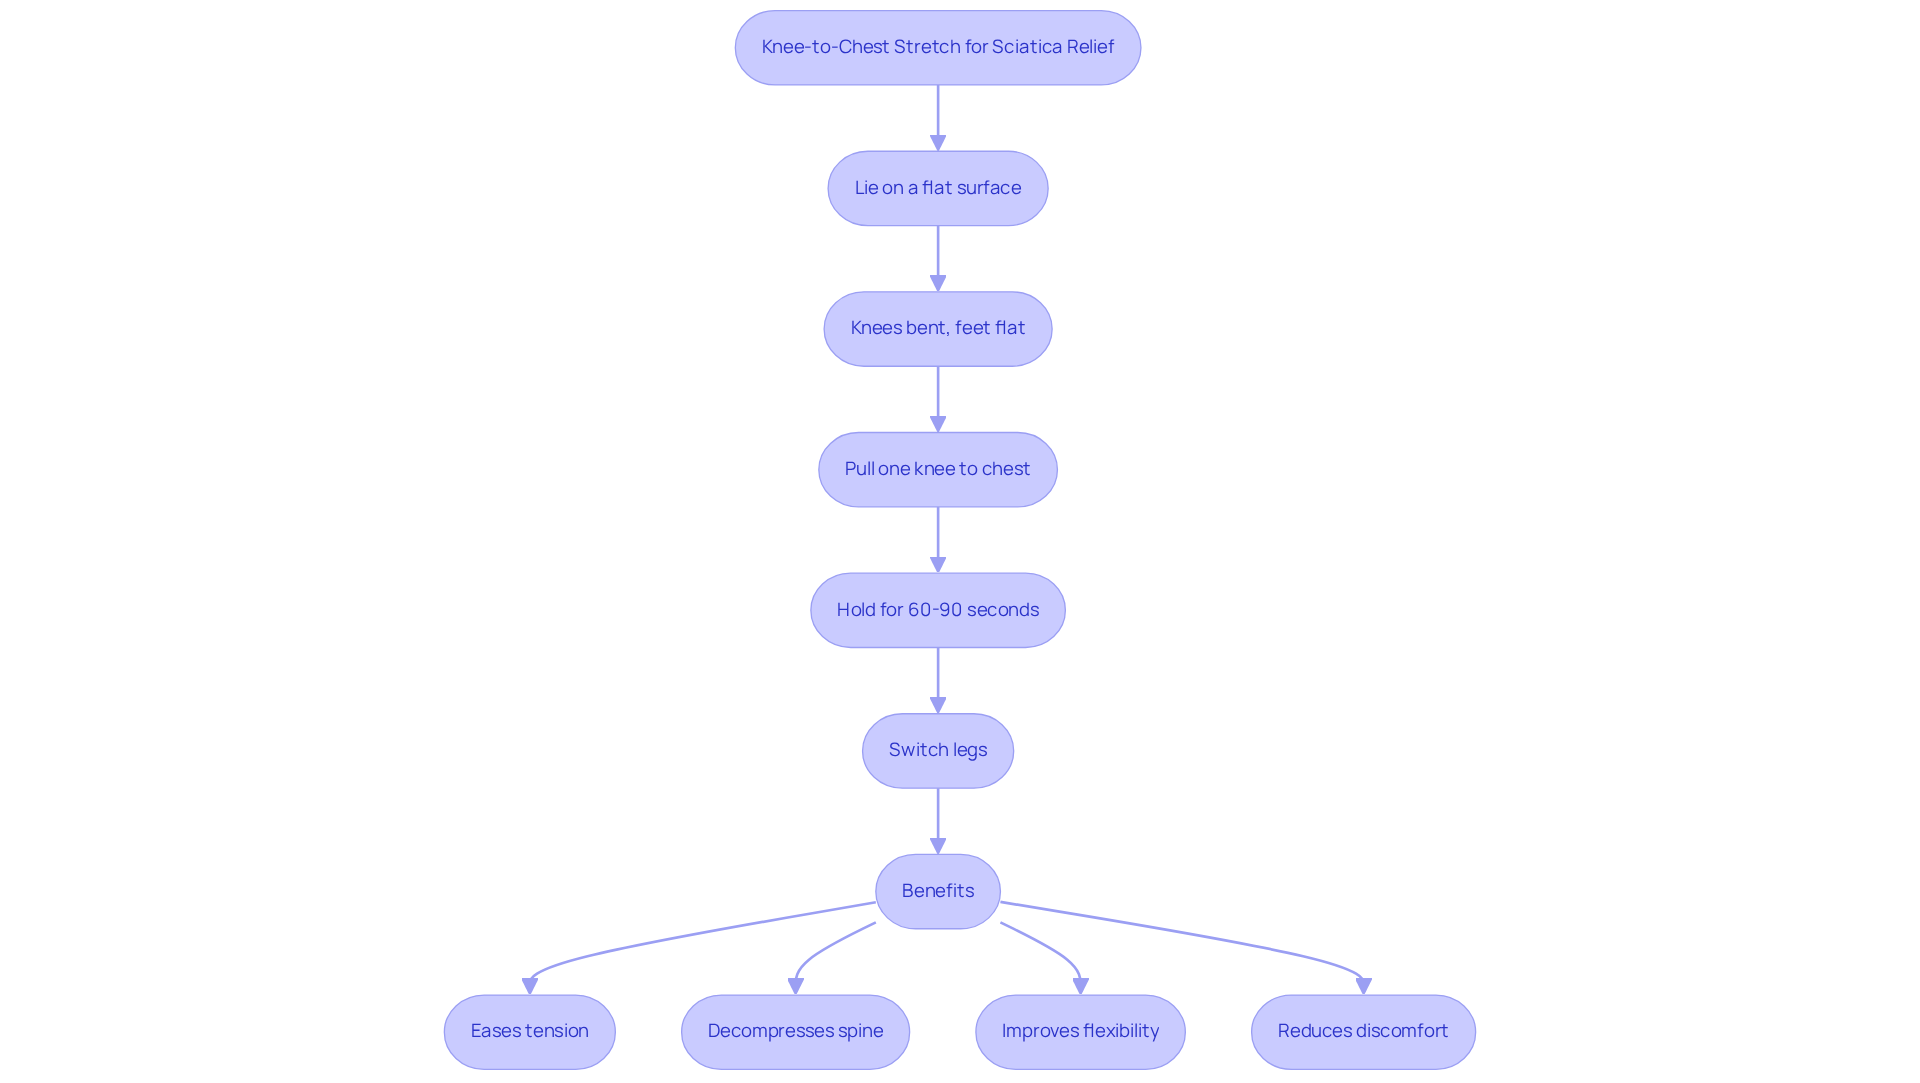
The Knee-to-Chest Stretch is a simple yet effective exercise that can help alleviate discomfort in your lower back. To execute this stretch, lie on a flat surface with your knees bent and feet flat on the floor. Gently pull one knee toward your chest while keeping the other foot grounded. Hold this position for 60 to 90 seconds before switching legs. This stretch helps ease tension in your back and glutes, which can bring relief from pinched nerve sciatica stretches.
Many people struggle with persistent sciatic nerve pain, and incorporating pinched nerve sciatica stretches can help alleviate their discomfort and improve their daily lives. Studies show that practicing the Knee-to-Chest Stretch regularly can lead to a noticeable decrease in pain, with many people feeling 68% better within just 12 weeks. Experts emphasize that this stretch effectively decompresses the spine, providing immediate relief for numerous patients. A case study highlighted that individuals who regularly participated in this exercise experienced improved flexibility and reduced discomfort, showcasing its effectiveness in managing chronic lower back issues.
Incorporating the Knee-to-Chest Stretch into your daily routine, along with lifestyle changes and physical therapy, can empower you to reclaim your mobility and improve your overall quality of life. Remember, it’s essential to consult a healthcare provider before starting new exercises, especially if your symptoms worsen. Embracing this stretch can help you regain your mobility and enjoy life more fully.
Piriformis Stretch to Release Nerve Pressure
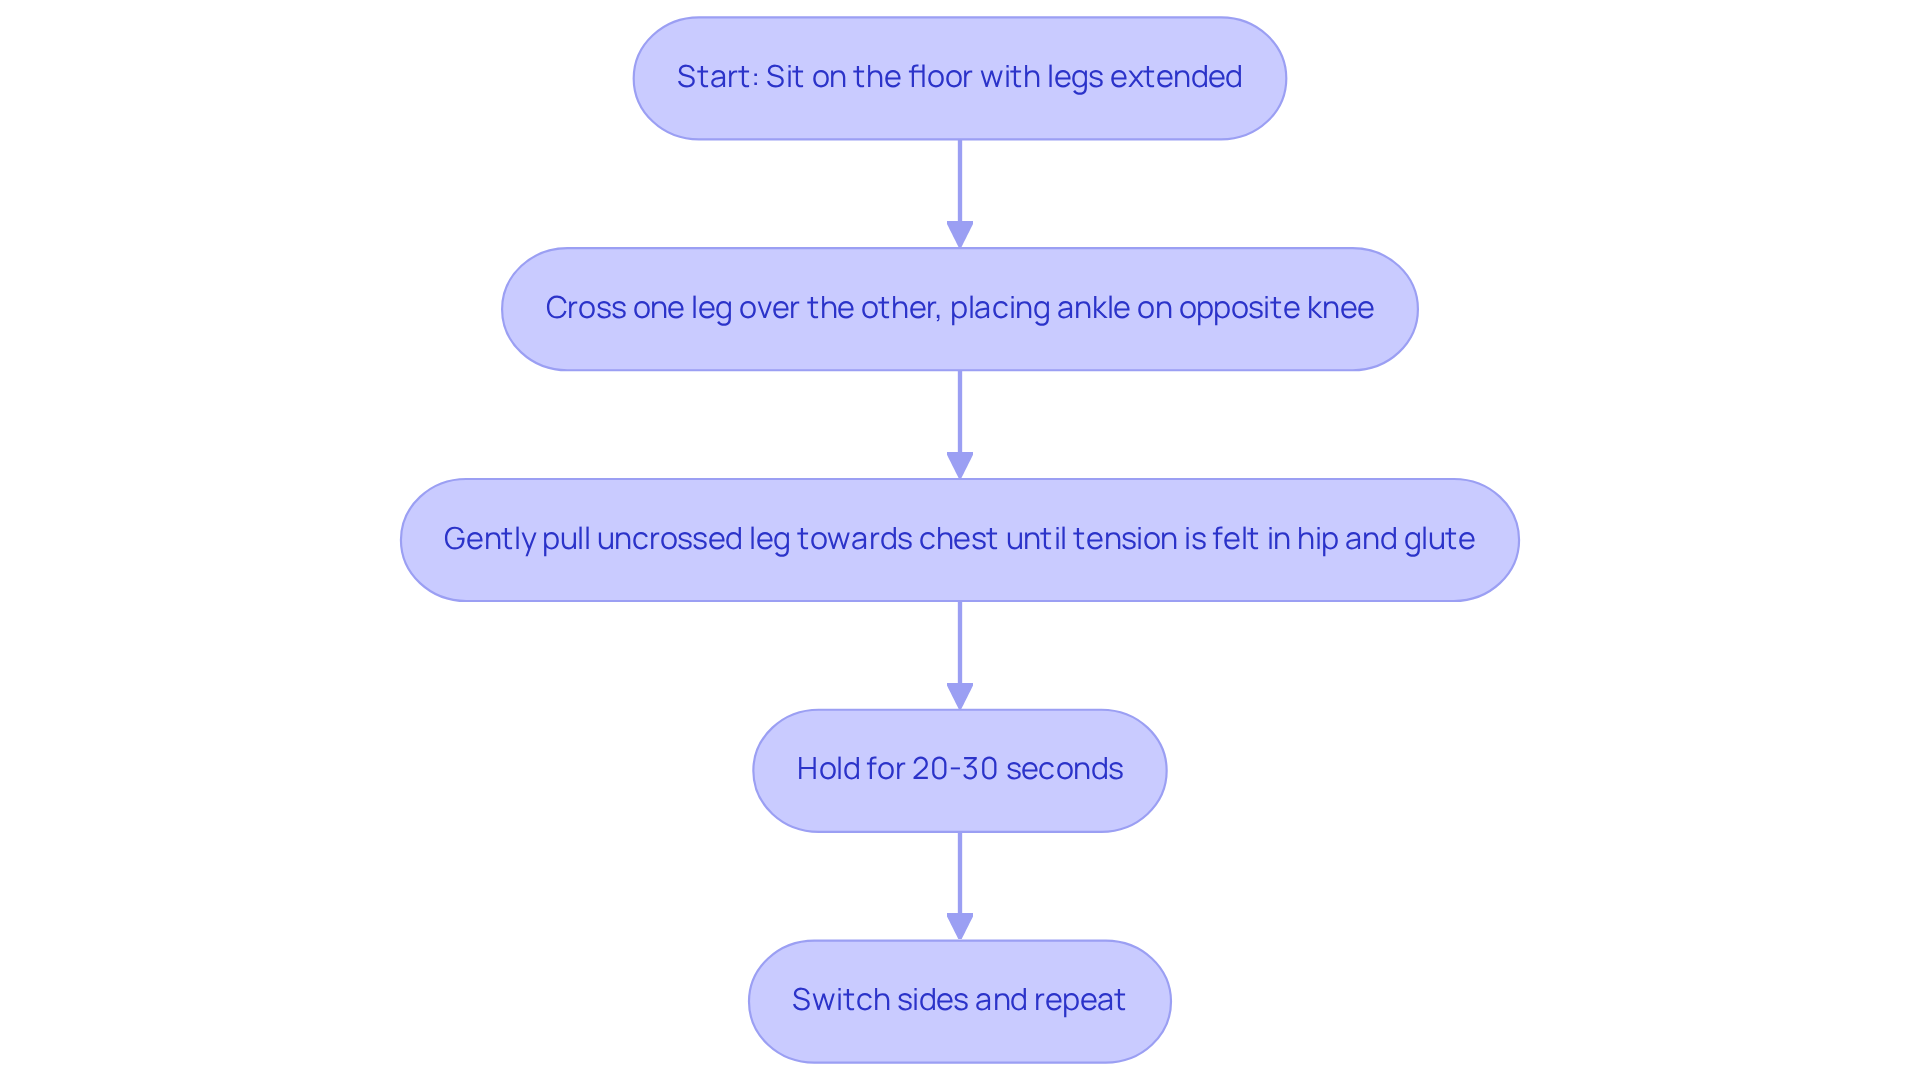
If you’re feeling discomfort that disrupts your daily life, you’re not alone; many face similar challenges with tightness in the piriformis muscle. Let’s explore a gentle stretch that can help. To perform the Piriformis Stretch effectively, start by sitting on the floor with your legs extended. Cross one leg over the other, placing your ankle on the opposite knee. Gently pull the uncrossed leg towards your chest until you feel a tension in the hip and glute area. Hold this position for 20-30 seconds before switching sides. This gentle stretch can be a comforting way to ease the tightness in your piriformis muscle, helping you feel more at ease.
Many have found that this stretch not only helps relieve nerve pressure but also brings a sense of relief and comfort. Research shows that it alleviates symptoms in about 70% of individuals suffering from piriformis syndrome. This exercise enhances flexibility and improves hip range of motion, which is crucial for overall mobility.
Case studies from Ponte Vedra Spine & Pain Center highlight the effectiveness of the Piriformis Stretch in clinical settings, where patients reported a significant reduction in sciatic nerve discomfort after incorporating this exercise into their rehabilitation routines. For example, one study recorded a 50% decrease in discomfort levels among participants who regularly engaged in the exercise over a four-week duration.
Experts emphasize the importance of pinched nerve sciatica stretches in managing sciatica, noting that they address the underlying tightness in the piriformis muscle, thereby relieving pressure on the sciatic nerve. Incorporating the Piriformis Stretch into a comprehensive treatment plan, which includes lifestyle changes, physical therapy, and dietary adjustments, can lead to improved outcomes for those experiencing chronic discomfort related to nerve compression. If you find that your pain isn’t improving, remember that reaching out for help is a strong step towards feeling better.
Hamstring Stretch for Lower Back Relief
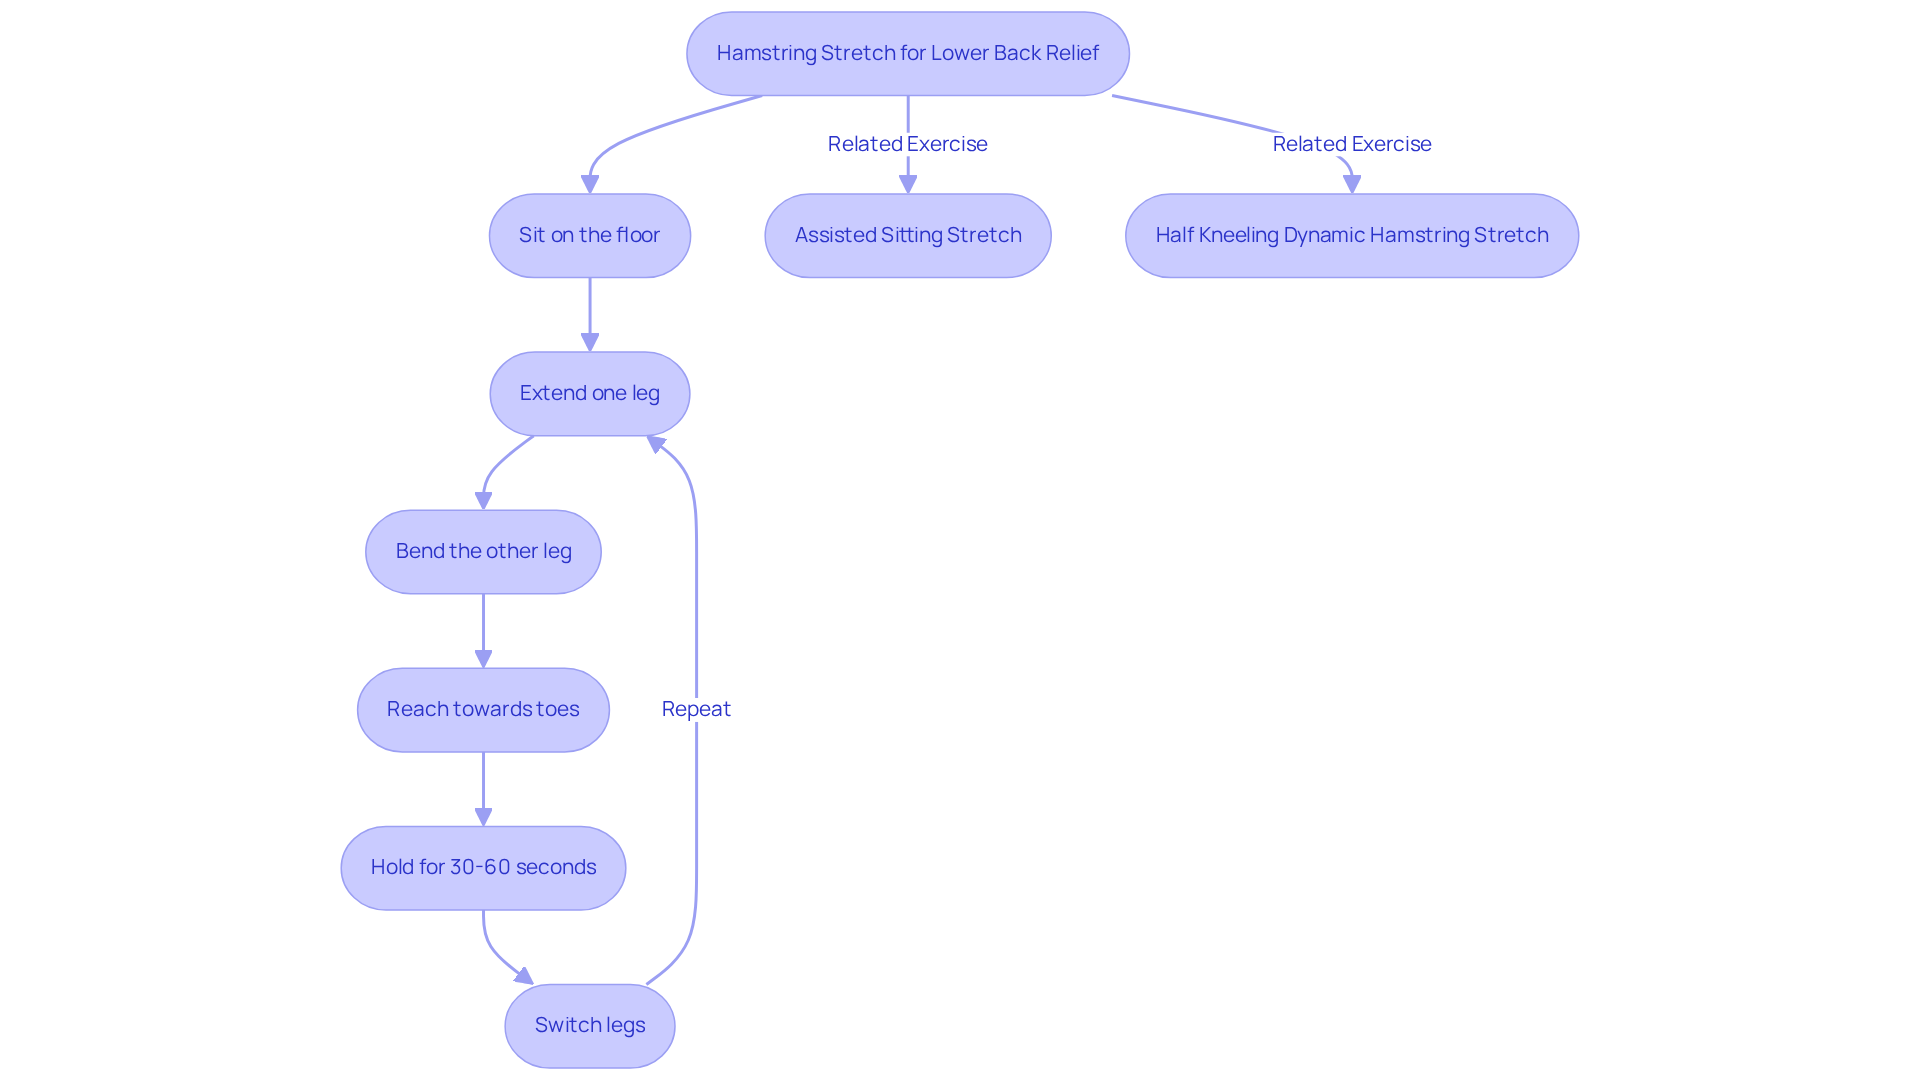
If you’ve ever felt discomfort in your lower back, you’re not alone; tight hamstrings might be the culprit. To perform the Hamstring Stretch effectively, start by sitting on the floor with one leg extended and the other bent. Reach towards the toes of the extended leg while keeping a straight posture. Hold this position for 30 to 60 seconds before switching legs. This exercise specifically targets the hamstrings, helping to relieve tension and improve overall flexibility.
Tight hamstrings can create discomfort that affects your daily life, making simple movements feel challenging. Consistently integrating hamstring exercises into your routine – preferably done twice daily – can greatly alleviate stress in the lumbar region and enhance muscle flexibility. As you stretch, focus on the gentle tension in your muscles, allowing yourself to breathe and relax into the position for 30 to 60 seconds.
Many people have found that incorporating hamstring exercises into their routine brings noticeable relief from lower back discomfort. For instance, the Assisted Sitting Stretch, which involves using a towel to pull one foot towards the body while leaning forward, has been effective in increasing hamstring flexibility and reducing lower back pressure. Similarly, the Half Kneeling Dynamic Hamstring Stretch, performed from a kneeling position, enhances mobility and flexibility, making it a valuable addition to any stretching routine.
Alongside these exercises, evidence-based alternatives such as customized workout programs and dietary changes can further aid in pain management. Strengthening exercises targeting the quads and glutes can reduce pressure on the knee joint, while a diet rich in omega-3s and anti-inflammatory foods can contribute to overall joint health. Expert insights highlight the significance of consistency in executing these exercises. As one expert observed, ‘With repetition, your body starts to recognize the movement as non-harmful, allowing you to attain a deeper level of flexibility over time.’ Additionally, maintaining proper posture during stretches – such as tucking the pelvis in during the half-kneeling stretch – can further enhance their effectiveness. It is important to note that individuals with conditions such as sciatica or lumbar herniated disc should consult a medical professional before starting any pinched nerve sciatica stretches routine.
Embracing these stretches can be a transformative step towards a more comfortable and flexible life.
Cat-Cow Stretch for Spinal Flexibility
If you’re feeling the weight of chronic discomfort, you’re not alone; many people face similar challenges. To perform the Cat-Cow Stretch, start on all fours, making sure your wrists are aligned under your shoulders and your knees under your hips. Take a deep breath, arch your back into the Cow Pose, and then exhale as you round your spine into the Cat Pose. This gentle sequence can be repeated for 5 to 20 cycles, enhancing spinal mobility and relieving tension in your neck and torso.
Many have found that the Cat-Cow Stretch can truly enhance spinal flexibility, bringing relief and comfort. For instance, participants in a study reported improved spinal mobility and a decrease in discomfort levels after practicing yoga that included this pose. Specifically, discomfort levels dropped from an average of 6 out of 10 to 3 after six months of consistent practice, highlighting how effective this exercise can be in managing discomfort.
The benefits of the Cat-Cow Stretch extend beyond flexibility; it also fosters postural awareness and balance, which are crucial for preventing back discomfort. Experts recommend integrating this stretch into your daily routine, especially if you’re dealing with chronic discomfort or stiffness. Plus, there are modifications for beginners, like using forearms instead of wrists for support, ensuring that this practice remains accessible and safe for everyone.
Incorporating the Cat-Cow Stretch into your routine can be a valuable step in managing discomfort, particularly for those with spinal issues. Its inclusion in therapeutic routines can lead to lasting improvements in both discomfort relief and functional mobility. Furthermore, as part of a comprehensive approach to managing joint and musculoskeletal pain, making lifestyle changes, engaging in physical therapy, and incorporating exercise-key elements highlighted in the FAQs-can significantly enhance your outcomes, aligning with the evidence-based practices advocated by Ponte Vedra Spine & Pain Center. Embracing the Cat-Cow Stretch could be the first step toward a more comfortable and active life.
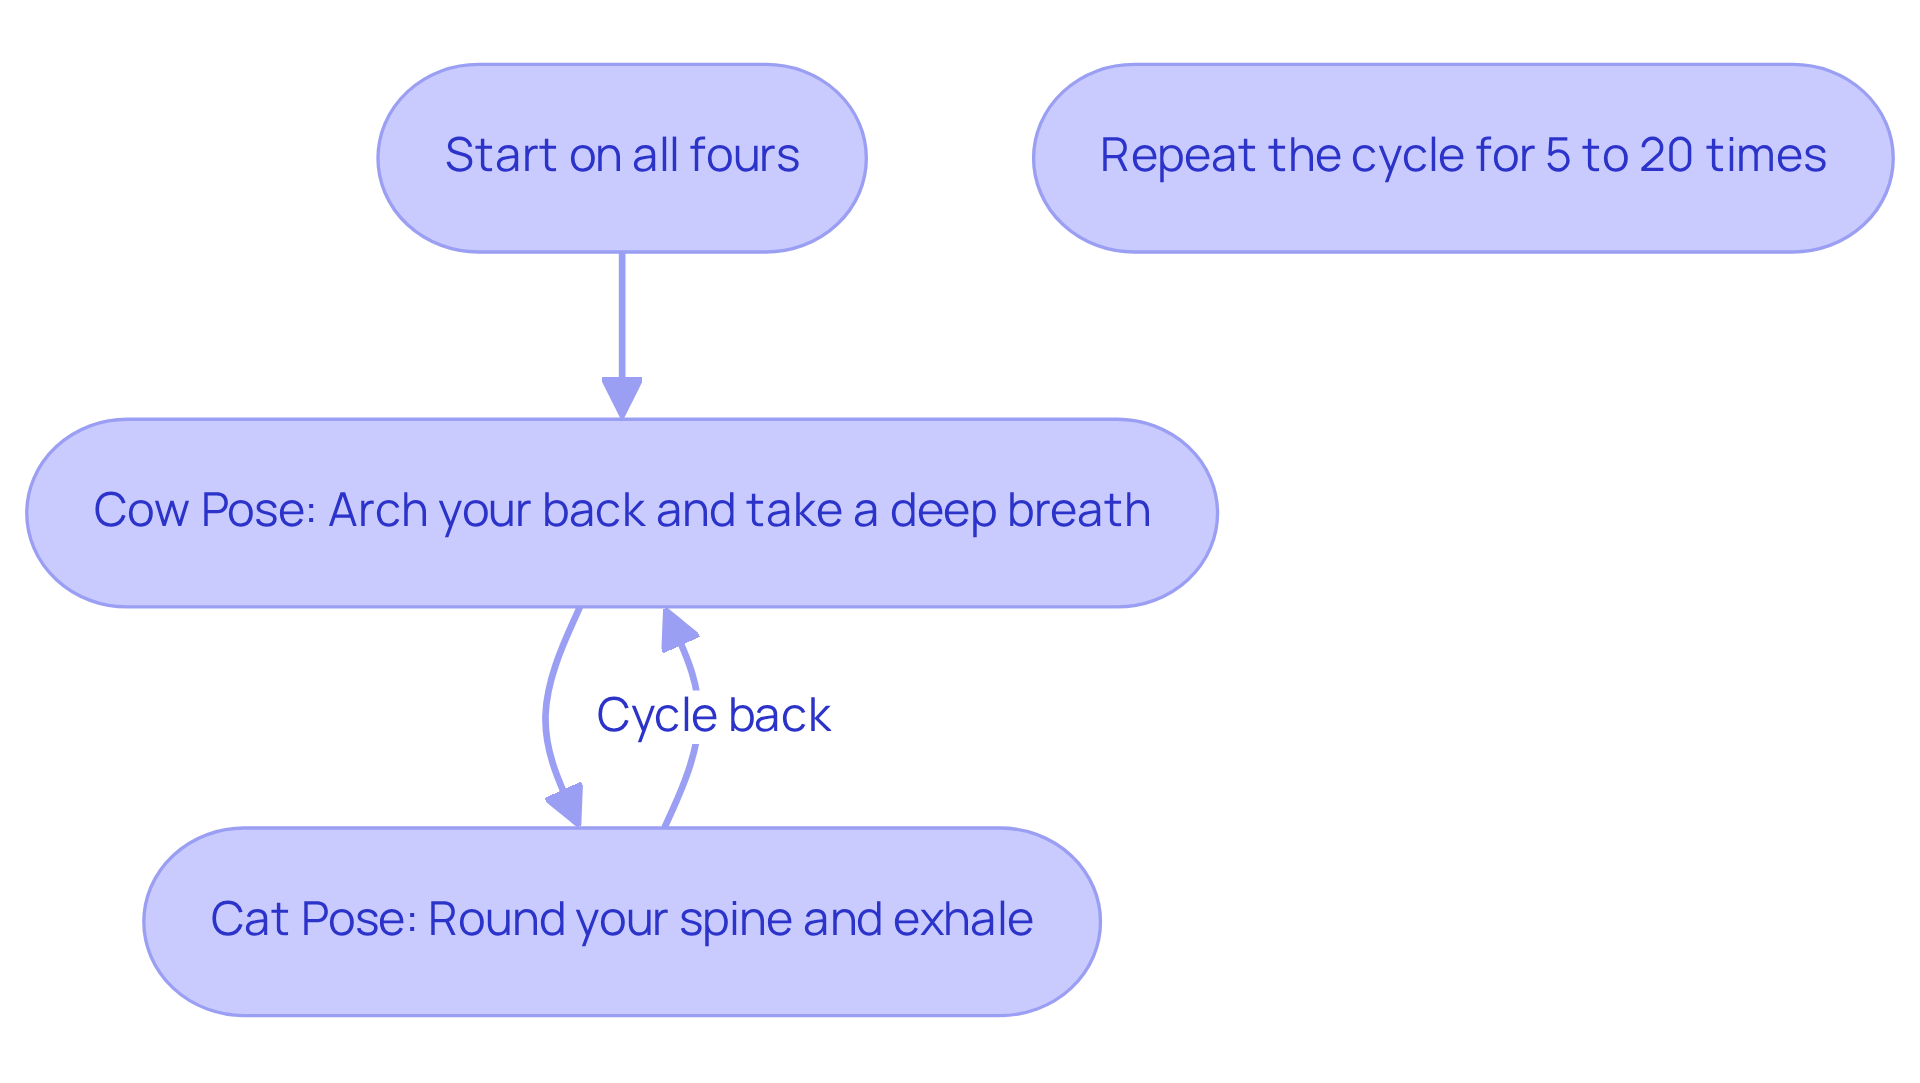
Figure Four Stretch for Hip and Lower Back Relief
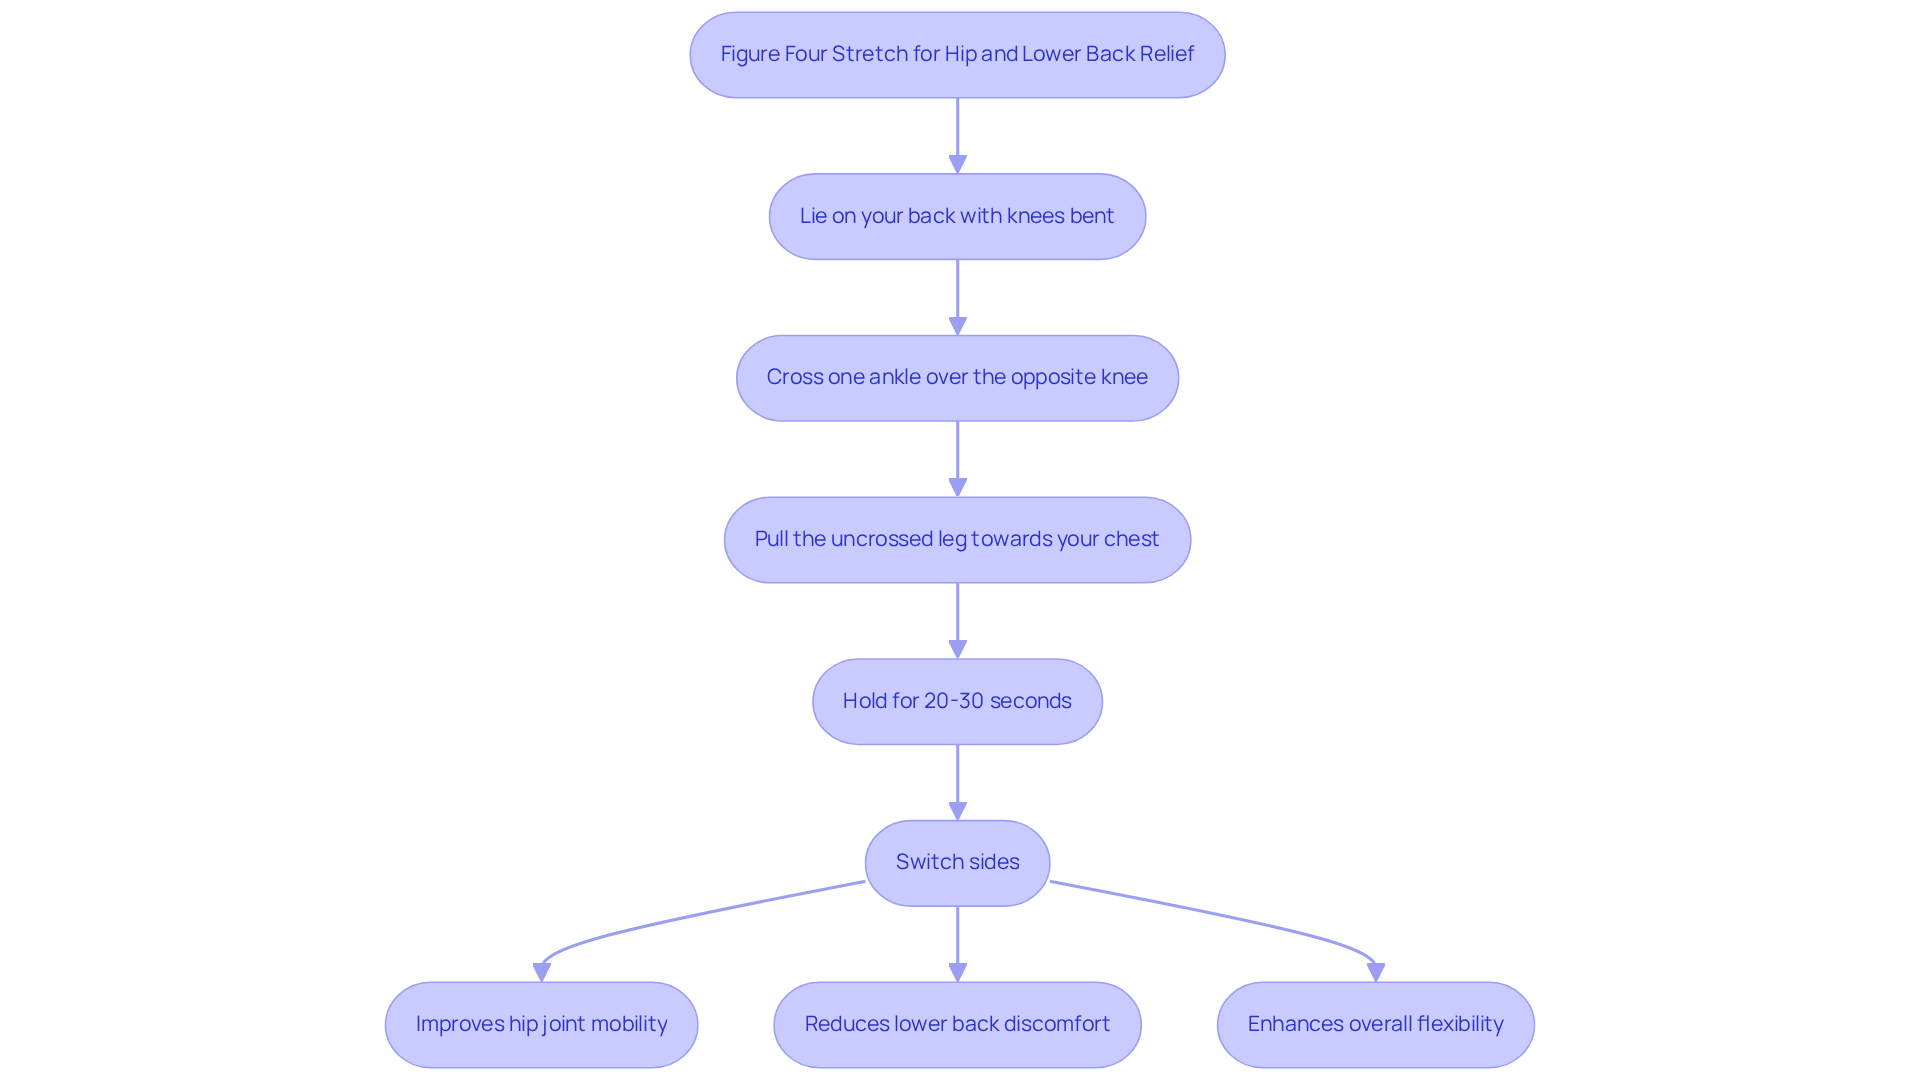
Many people struggle with persistent discomfort in their hips and lower back, making daily activities challenging. To perform the Figure Four Stretch, lie on your surface with your knees bent. Cross one ankle over the opposite knee, forming a ‘4’ shape. Gently pull the uncrossed leg towards your chest until you feel a tension in your hip and glute area. Hold this position for 20-30 seconds before switching sides. This stretch helps ease tension in your hips and pelvic area, particularly targeting the piriformis muscle, which plays a key role in keeping your hips mobile and stable. Regular practice of pinched nerve sciatica stretches can help alleviate discomfort associated with sciatica and enhance overall flexibility.
Recent studies show that the Figure Four Stretch can really help improve hip joint mobility and reduce lower back discomfort. Individuals who integrate this exercise into their routine often experience better flexibility and a decrease in discomfort. For instance, a study involving older adults found that targeted stretching exercises, including the Figure Four Stretch, led to significant reductions in muscle stiffness and discomfort levels.
Incorporating lifestyle changes such as regular exercise, physical therapy, and the use of assistive devices can further enhance the benefits of this exercise. Evidence-based alternatives for pain management, including tailored exercise programs, have been shown to outperform some traditional treatments in the long run. Case studies further demonstrate the effectiveness of this technique. One participant reported a significant enhancement in spinal health after consistently practicing the Figure Four Stretch, noting that it facilitated easier engagement in daily activities. Another case highlighted the stretch’s role in alleviating tightness caused by prolonged sitting, a common issue for many individuals.
Embracing the Figure Four Stretch can be a transformative step towards a more comfortable and active life.
Child’s Pose for Relaxation and Pain Relief
When you feel the weight of the world on your shoulders, kneeling on the floor and sitting back on your heels can be a comforting start. Gently extend your arms forward, allowing your forehead to rest on the ground, embracing the support beneath you.
Take a moment to breathe deeply, holding this position for 30 seconds to 1 minute, letting go of tension with each exhale. This gentle pose helps to lengthen your spine and hips, inviting relaxation and easing the stress that weighs you down.
Seated Forward Bend for Lower Back Stretching
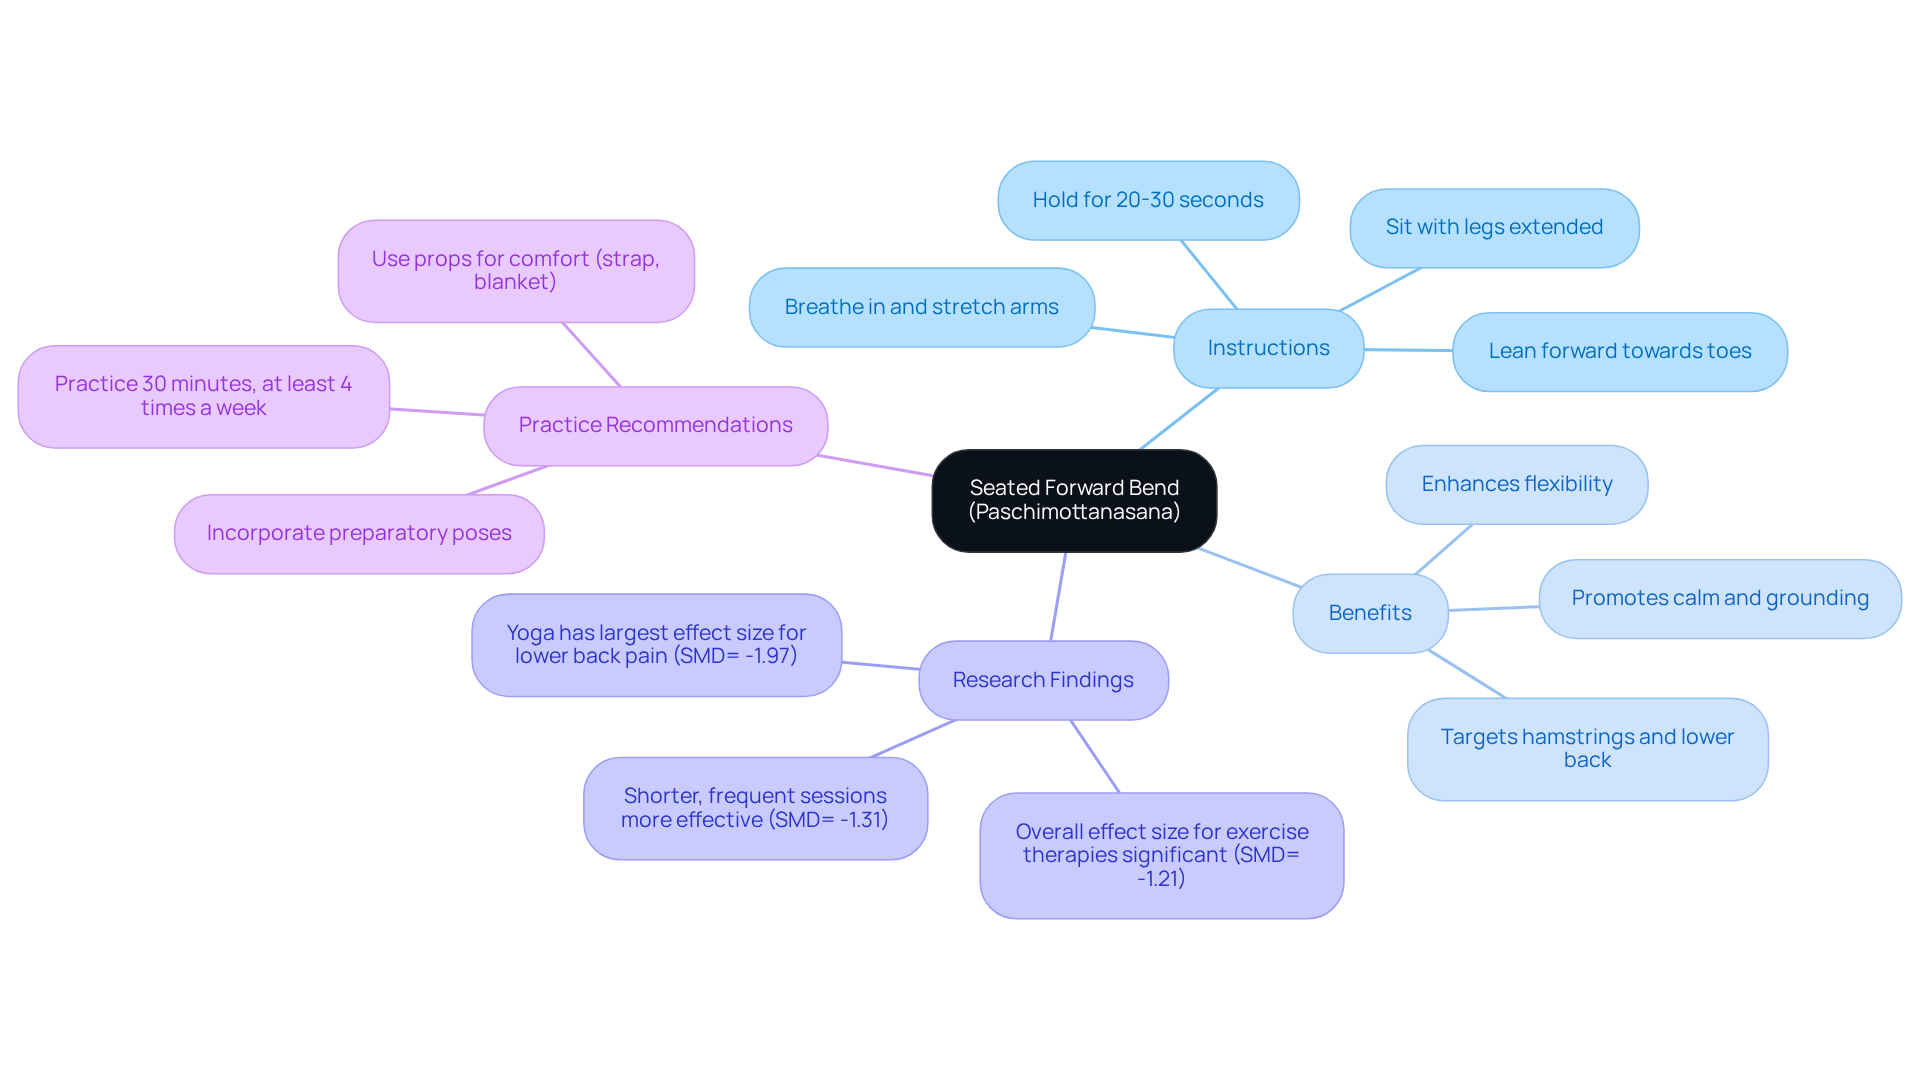
Living with lower back discomfort can feel overwhelming, affecting your daily activities and overall well-being. To perform the Seated Forward Bend, or Paschimottanasana, start by sitting on the floor with your legs extended straight in front of you. Take a deep breath in, stretch your arms up, and as you breathe out, gently lean forward towards your toes. Hold this position for 20-30 seconds. This stretch effectively targets the hamstrings and lower back, helping to alleviate tension and enhance flexibility.
Studies reveal that practicing yoga, including the Seated Forward Bend, can greatly help ease lower back discomfort. A meta-analysis of 42 randomized controlled trials indicated that yoga exhibited the largest effect size among various exercise therapies for lower lumbar discomfort. This means that adding yoga to your routine can really make a difference in how you feel and move.
The Seated Forward Bend not only stretches the entire back of your body, including your calves and spine, but also promotes a sense of calm and grounding. Remember to be gentle with yourself, especially if you have tight hamstrings or lower back discomfort. You can use props like a strap or a folded blanket to make the pose more comfortable and enjoyable.
Try to practice the Seated Forward Bend for about 30 minutes, at least four times a week, to really feel the benefits. Research has shown that shorter, more frequent exercise sessions produce better outcomes for alleviating discomfort in the lumbar region.
The Seated Forward Bend can be a wonderful way to help manage lower back discomfort while also bringing a sense of calm. As Barbara Benagh observes, ‘The mental effort required to perform this pose with ease and patience can be as intense as the tension itself.’ By embracing the Seated Forward Bend, you can nurture both your body and mind, paving the way for a more comfortable and balanced life.
Standing Quad Stretch for Hip Flexor Relief
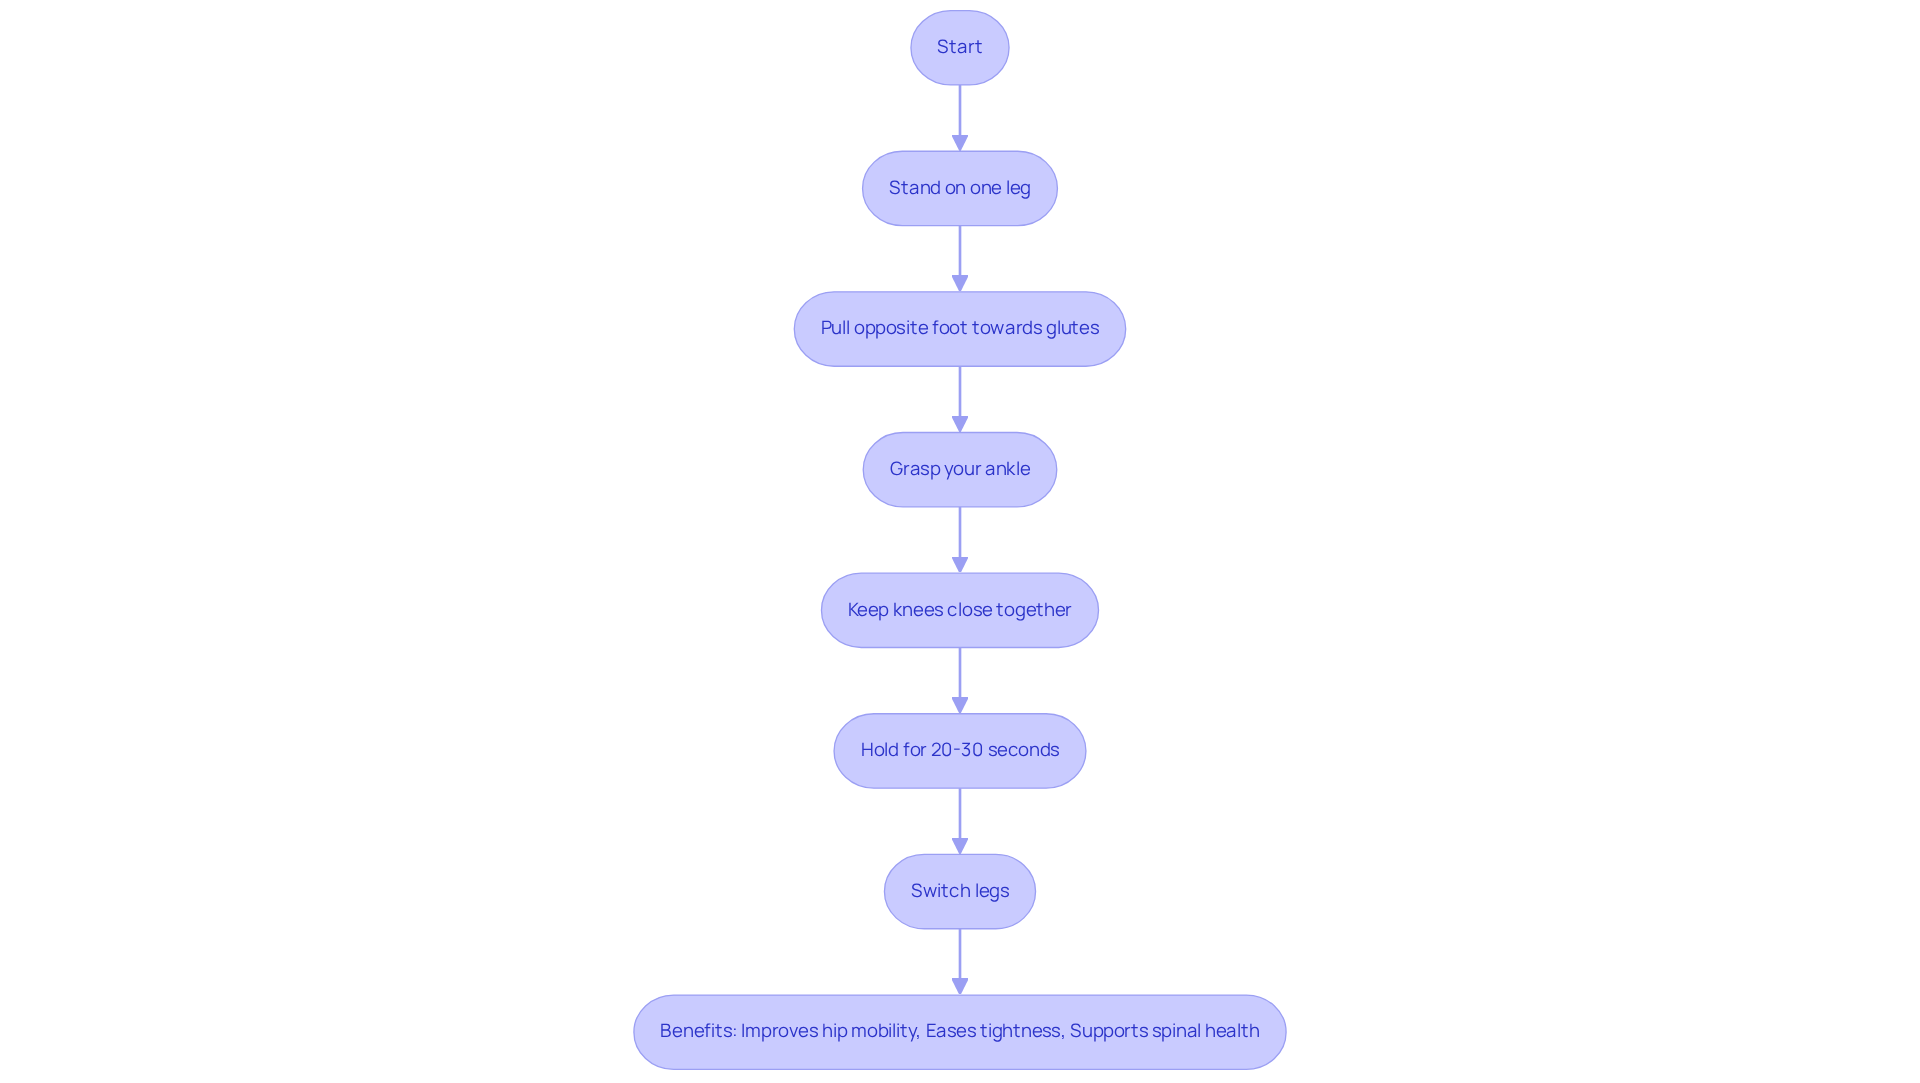
If you’re struggling with lumbar discomfort, you’re not alone; many people face this challenge, and there are ways to find relief. The Standing Quad Stretch is a gentle yet effective way to help ease tightness in your hip flexors, which can often contribute to lower back pain. To perform this stretch, stand on one leg and pull the opposite foot towards your glutes, grasping your ankle. Keep your knees close together and hold the position for 20-30 seconds before switching legs.
Tight hip flexors can cause your pelvis to tilt forward, leading to increased strain on your lower back. This discomfort can make everyday activities feel challenging. Research shows that individuals with lumbar discomfort often have less strength in their glute muscles, highlighting the importance of maintaining flexibility in your hip flexors for better spinal health. A recent study even found a link between hip flexor length and lower back pain in those who sit for long periods, reinforcing the need to care for your hips.
By adding the Standing Quad Stretch to your daily routine, you can gently ease tightness and improve your hip mobility, helping you feel more comfortable throughout the day. Consistent practice of this stretch, along with personalized exercise plans and a balanced diet, can significantly enhance your posture and reduce lower back discomfort. For the best results, aim to hold the stretch for 20-60 seconds and repeat it 2-4 times per session. These simple steps can make a world of difference, helping you reclaim your comfort and enjoy life to the fullest. Remember to take regular breaks from sitting to further prevent tight hip flexors and support your overall spinal health.
Lying Spinal Twist for Back and Hip Relief
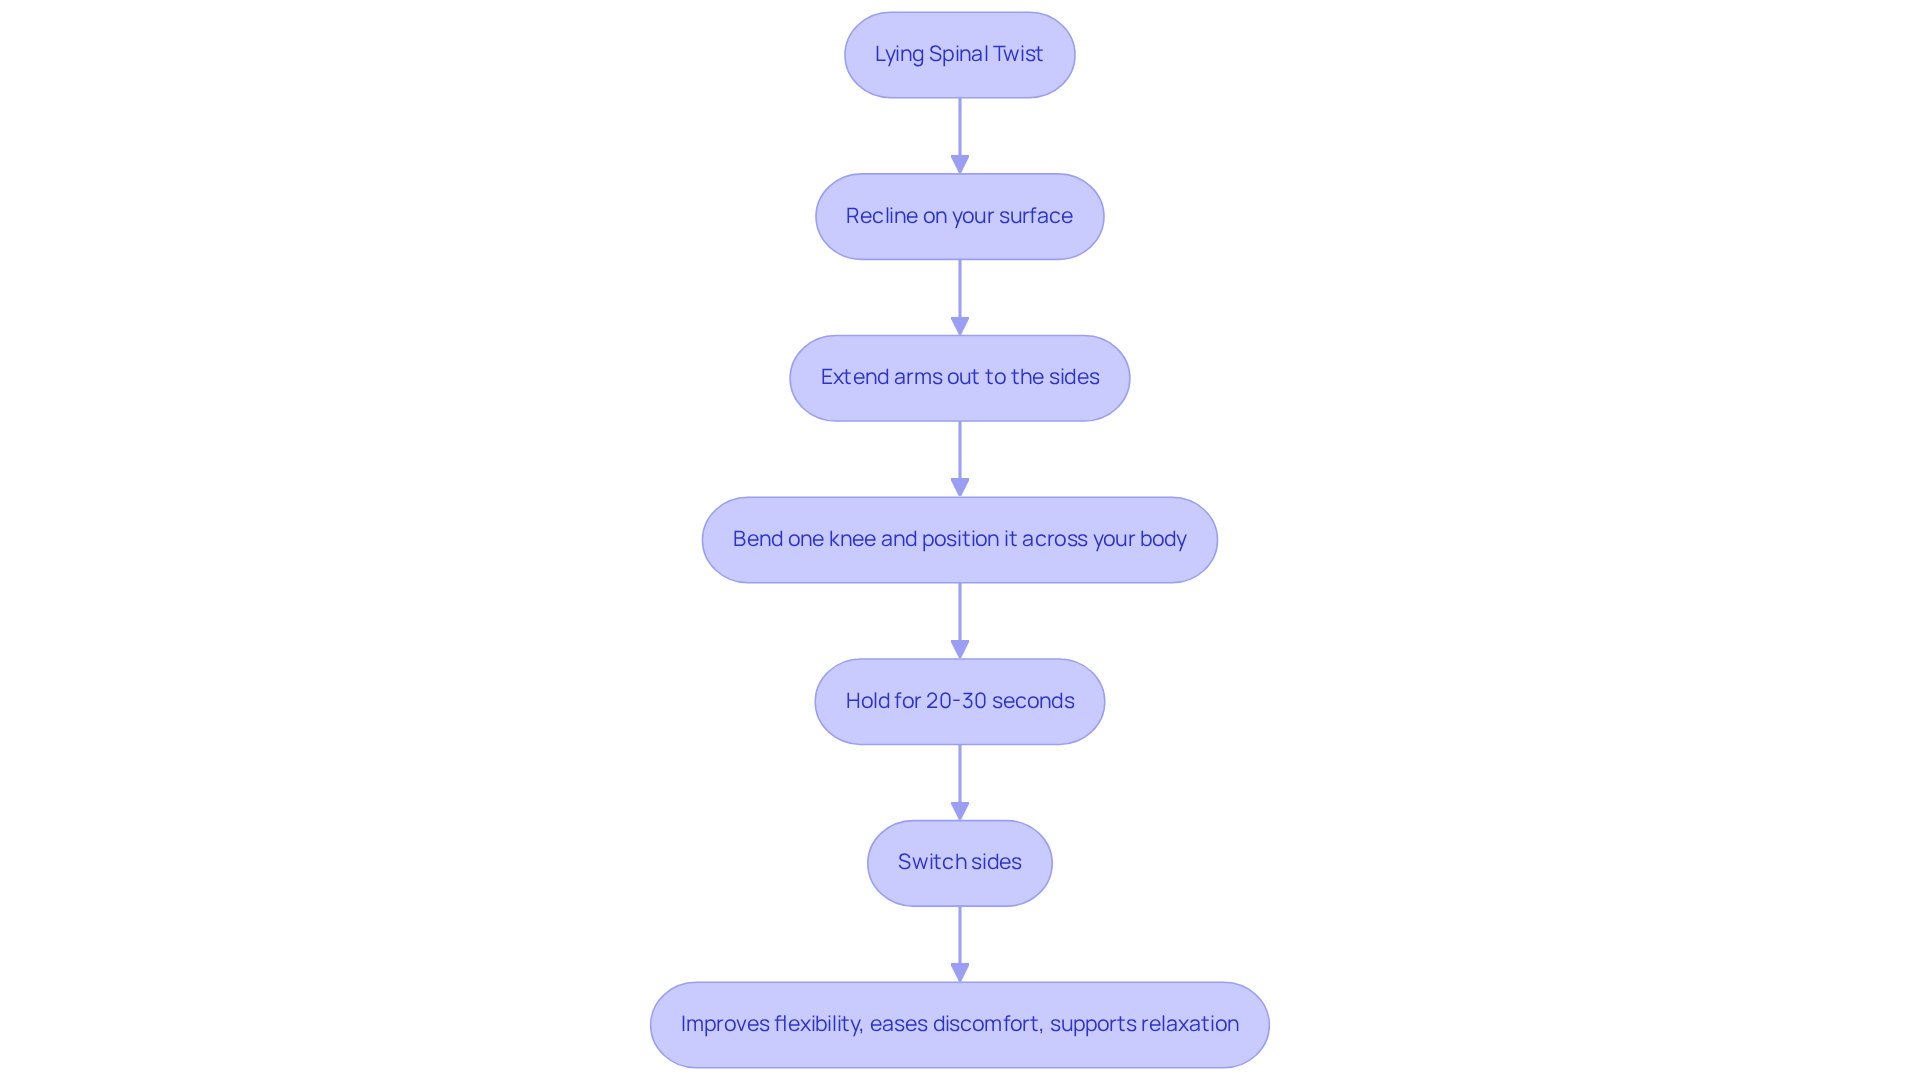
If you’re feeling tension in your back, the Lying Spinal Twist might just be the gentle relief you need. Start by reclining on your surface with your arms extended out to the sides. Bend one knee and gently position it across your body towards the floor. You might find it challenging to maintain your shoulders on the ground while twisting, but that’s okay; it’s part of the process. Hold this position for 20-30 seconds before switching sides. You may find that this gentle twist helps ease tension in your back and hips, bringing a sense of relief and comfort.
Many people have discovered that the Lying Spinal Twist can be a soothing way to improve flexibility and ease discomfort in their backs. A comprehensive analysis indicated that specific twisting exercises can significantly enhance discomfort levels and mobility in patients suffering from lower back issues. It’s heartening to know that so many have found relief and improved their daily lives by simply adding this exercise to their routine.
The advantages of the Lying Spinal Twist go beyond simple physical relief; it also supports relaxation and stress alleviation, which are essential for individuals coping with chronic discomfort. Participating in this gentle yet effective exercise can be enhanced by lifestyle modifications, such as weight management and physical therapy, which are established methods for addressing joint discomfort without medication. By incorporating a customized exercise program, patients can experience improved mobility and a greater sense of well-being, making it a valuable addition to any management regimen. Imagine feeling more at ease in your body, not just from exercise, but from nourishing your body with the right foods too.
Daily Stretching Routine for Long-Term Sciatica Management
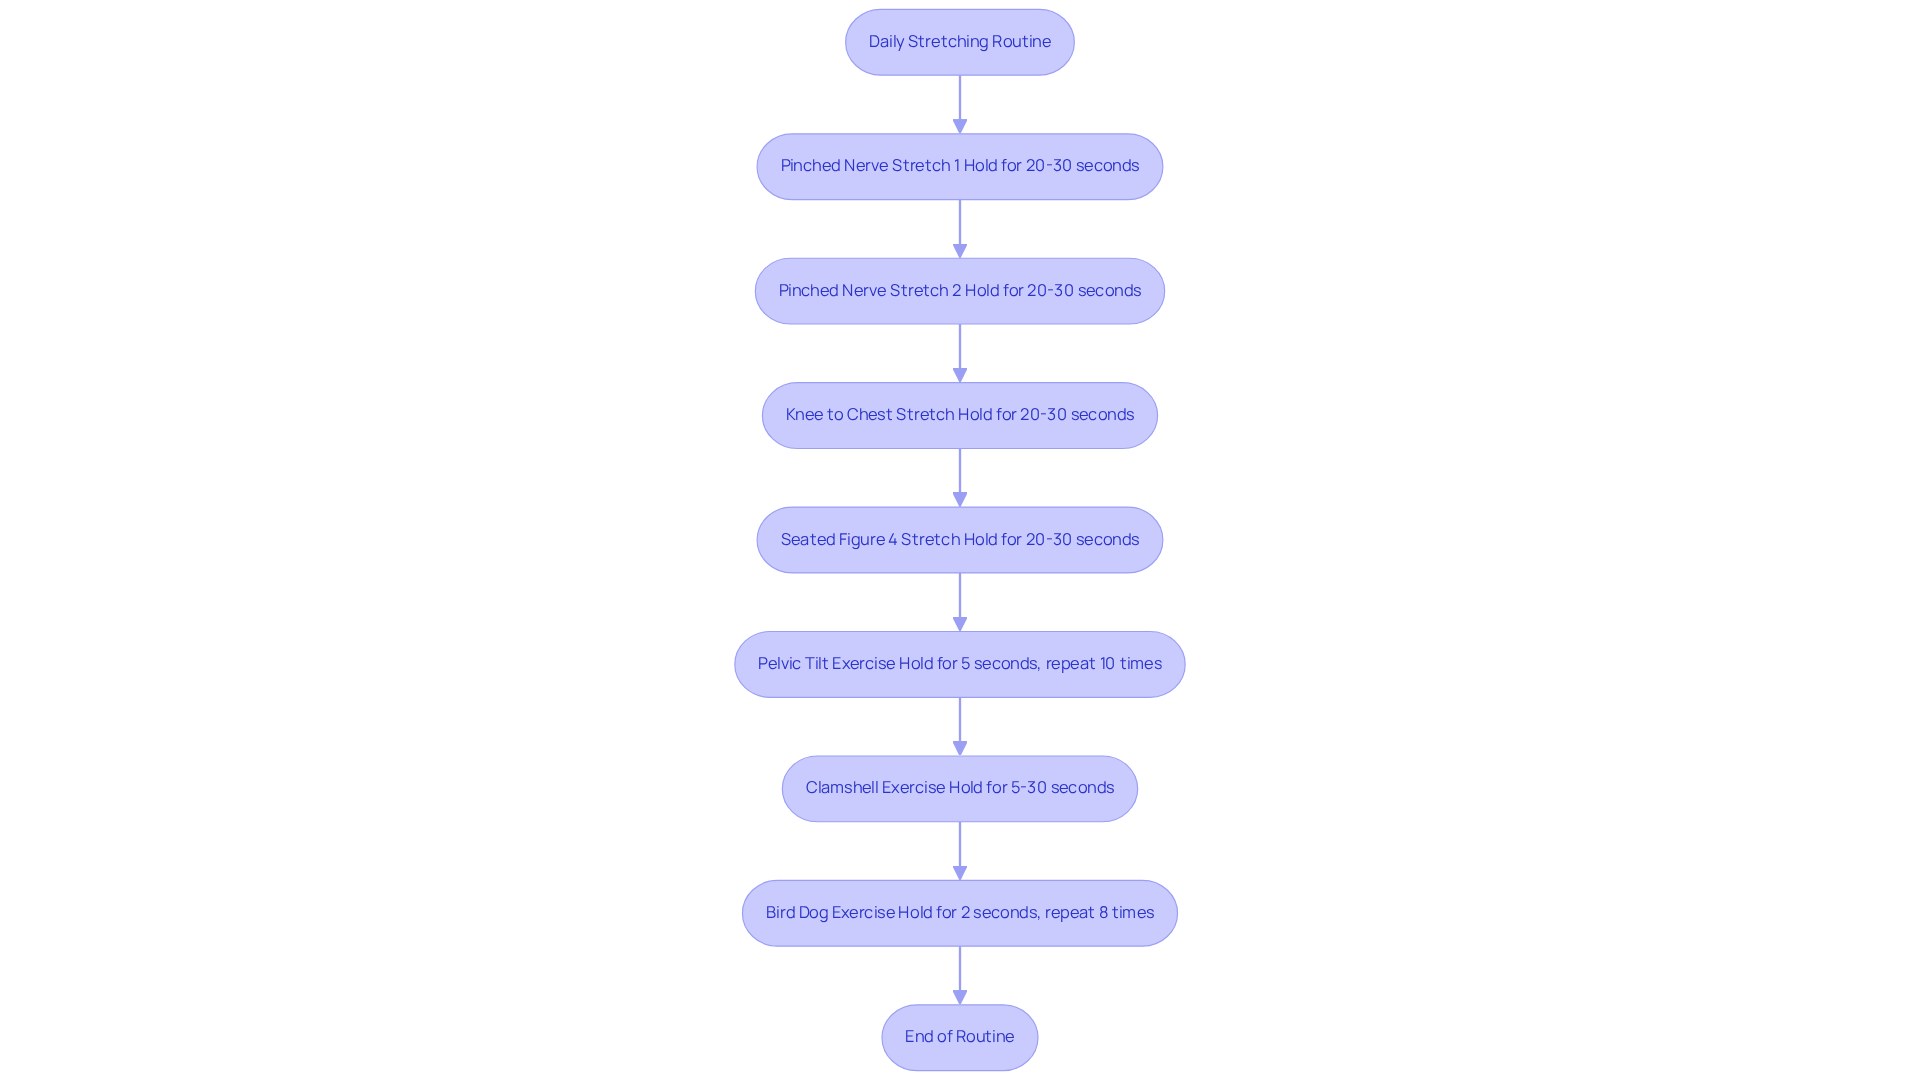
Living with sciatica can feel overwhelming, making it hard to find relief. To effectively manage your discomfort, we recommend establishing a daily stretching routine that includes pinched nerve sciatica stretches along with other targeted exercises. We suggest holding each stretch gently for about 20 to 30 seconds, allowing your body to relax without any bouncing. Setting aside just 5 to 10 minutes each day for stretching can make a world of difference in your journey to feeling better. This practice not only helps maintain flexibility but also plays a significant role in reducing pain associated with pinched nerve sciatica stretches. Regular pinched nerve sciatica stretches can alleviate tightness in the muscles surrounding the sciatic nerve, promoting better spinal health and overall well-being.
Conclusion
If you’re struggling with the discomfort of sciatica, adding simple stretches to your daily routine can truly make a difference. We’ve shared ten gentle stretches that can help ease tension and support your spinal health. By practicing these stretches regularly, you can take meaningful steps toward managing your pain and improving your mobility. Remember, consistency and proper technique are key to getting the most out of these stretches. Each stretch, from the Knee-to-Chest to the Lying Spinal Twist, is designed to help reduce discomfort and improve your flexibility. Incorporating these stretches into your daily routine, along with some lifestyle changes and guidance from professionals, can greatly enhance your quality of life. Embracing a daily stretching routine can bring you immediate relief and support your long-term health journey. If you’re dealing with sciatica, it’s a good idea to talk to a healthcare professional who can help you create a program that fits your needs. By focusing on these simple yet effective practices, you can enjoy a more comfortable and active lifestyle, rediscovering the joy of movement in your daily life.
Frequently Asked Questions
What is the Knee-to-Chest Stretch and how is it performed?
The Knee-to-Chest Stretch is an exercise designed to alleviate lower back discomfort. To perform it, lie on a flat surface with your knees bent and feet flat on the floor. Gently pull one knee toward your chest while keeping the other foot grounded. Hold this position for 60 to 90 seconds before switching legs.
What benefits does the Knee-to-Chest Stretch provide for sciatica relief?
This stretch helps ease tension in the back and glutes, which can relieve discomfort associated with pinched nerve sciatica. Regular practice can lead to a noticeable decrease in pain, with many individuals reporting up to 68% improvement within 12 weeks.
How does the Piriformis Stretch help with nerve pressure?
The Piriformis Stretch targets the piriformis muscle, which can become tight and contribute to nerve pressure. To perform it, sit on the floor with legs extended, cross one leg over the other, and gently pull the uncrossed leg toward your chest. This stretch can alleviate symptoms in about 70% of individuals with piriformis syndrome.
What is the recommended duration for holding the Piriformis Stretch?
It is recommended to hold the Piriformis Stretch for 20-30 seconds before switching sides.
How can the Hamstring Stretch benefit lower back discomfort?
The Hamstring Stretch targets tight hamstrings, which can contribute to lower back discomfort. To perform it, sit on the floor with one leg extended and the other bent, reaching toward the toes of the extended leg. Holding this position for 30 to 60 seconds can relieve tension and improve flexibility.
How often should hamstring exercises be incorporated into a routine for optimal relief?
It is suggested to integrate hamstring exercises into your routine twice daily to significantly alleviate stress in the lumbar region and enhance muscle flexibility.
What additional strategies can support pain management alongside these stretches?
Incorporating customized workout programs, dietary changes, and strengthening exercises targeting the quads and glutes can further aid in pain management. A diet rich in omega-3s and anti-inflammatory foods can also contribute to overall joint health.
What precautions should be taken before starting these stretches?
Individuals with conditions such as sciatica or lumbar herniated disc should consult a medical professional before beginning any pinched nerve sciatica stretches routine to ensure safety and appropriateness.
List of Sources
- Knee-to-Chest Stretch for Sciatica Relief
- Piriformis Stretch to Release Nerve Pressure
- Hamstring Stretch for Lower Back Relief
- Cat-Cow Stretch for Spinal Flexibility
- Figure Four Stretch for Hip and Lower Back Relief
- I added the figure-4 stretch to my mobility routine — here’s what happened to my hips and glutes
- June Stretch of the Month – The Figure 4 Stretch : RRC Polytech: Campus Well-Being
- A Stretch A Day: Figure-4 Stretch to Beat Back Pain | Regenexx® at New Regeneration Orthopedics
- Effects of combined hip exercise and passive stretching on muscle stiffness, pain perception and painrelated disability, and physical function in older adults with low back pain – PMC
- How to Do a Figure 4 Stretch: Tips and Variations
- Child’s Pose for Relaxation and Pain Relief
- Seated Forward Bend for Lower Back Stretching
- Standing Quad Stretch for Hip Flexor Relief
- Lying Spinal Twist for Back and Hip Relief
- New Treatments We’re Watching for Back Pain Relief in 2026
- Evaluating the effectiveness of six exercise interventions for low back pain: a systematic review and meta-analysis – PMC
- Back In Line Chiropractic Spine and Injury | Health Quotes in Dallas
- This 1 simple stretch has major benefits for back pain and sleep
- Supine Spinal Twist
- Daily Stretching Routine for Long-Term Sciatica Management
Living with this?
We treat this in Ponte Vedra Beach.
Dr. Eli Loch, D.O. — double board-certified in anesthesiology and pain medicine. Reading about it only goes so far; a diagnosis tells you which of these actually applies to you.